Wednesday, February 19, 2014

Burch Clay Cats

Third Grade Art Lesson
3 Class Periods
Burch Clay Cats, Third Grade Art Lesson
 
This is a new lesson that I attempted this year with my third grade students.  Our previous lesson was a cat painting based off of Laurel Burch.  You can view the lesson, information about the artist and see student examples by clicking on this link: Burch Cats. Still feeling inpired by the artist we studied, I decided to continue the Laurel Burch theme in our clay sculpture unit.

Day 1:

Students completed this task through follow along demonstation.
1.  Roll a slab out of clay.  You want the slab to be "pancake thick."
2.  Wrap the slab around a paper cup.
3.  Squeeze the clay near the top of the cup to create the cat's head.
4.  Smooth out clay with a little water.  Watch out for MUD. (Too much water will make the clay hard to work with).
5.  Pinch out the ears.
6.  Roll coils to create the tail and legs.  Legs can also be drawn on.  Discuss slip and score technique with students. (For this age in my curriculum this is review vocabulary).
Pinching ears and adding tail.

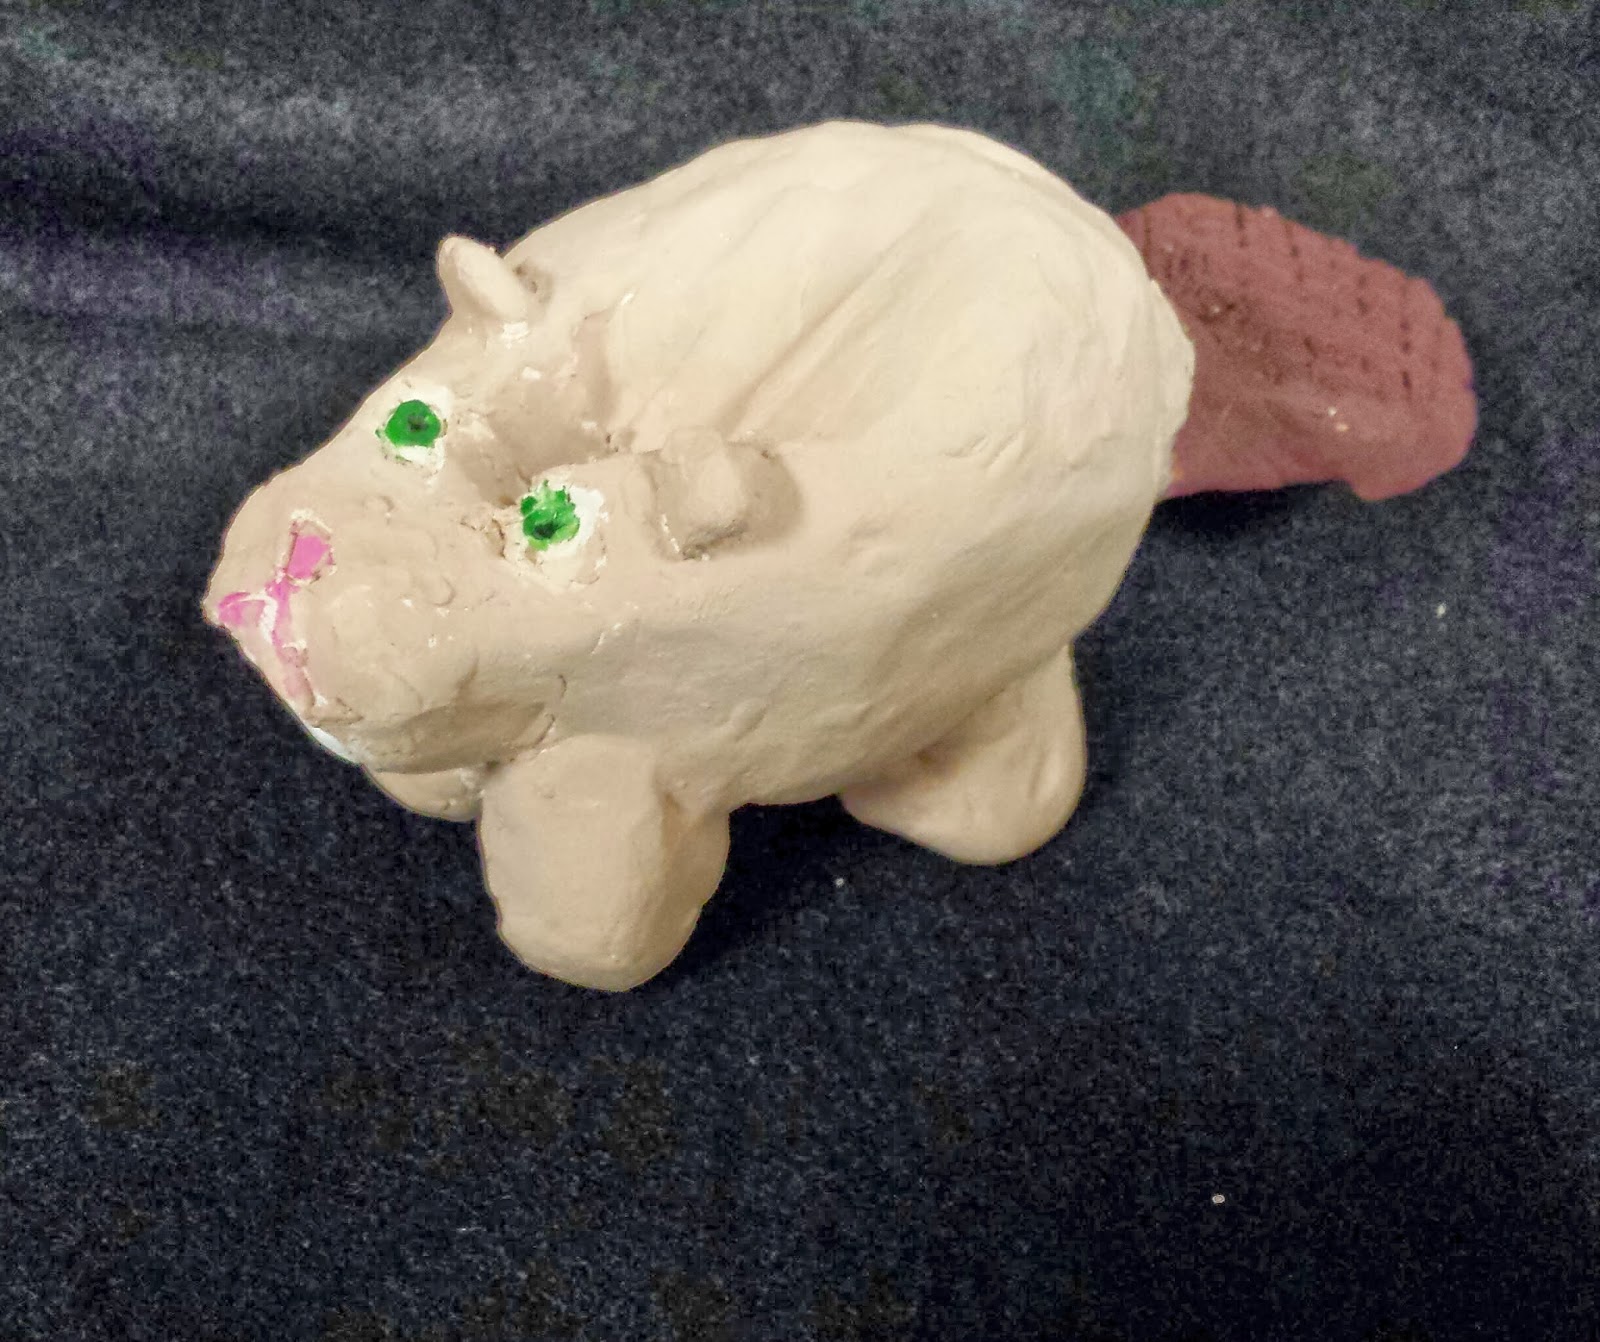
7. Details were added to the cat (Burch "eyes, nose, swoop," holes for the whiskers and designs for the body).  I had different items out to create the patterns on the body (lego pieces, plastic canvas, buttons, shells, etc.)
8.  Remove the cup.  Scratch name and class code inside the cat's body.
Cats drying for the kiln.

Day 2:

This is the youngest age that I have glazed with students at the elementary school.  We discussed what glaze is made of, what happens to it when it is fired, and how expensive it is for an art room supply. 

For this part of the lesson I only have 5 colors for the students to choose from.  They are instructed to pick one color to completely glaze their cats with.  We use this as our base color for this piece.  Students work in groups.  The color selected determines who is in each group.

Students glaze their piece with two coats.  Students are careful not to get any glaze on the bottom of their  sculptures.

Day 3:

On this day students are allowed to use as many colors of glaze that they would like.  They can paint on designs of their own or paint in the designs they pressed into the clay on day 1 of this lesson.

For this to work, I have smaller containers of glaze all ready to go and set up on a counter in my room.  Each container is labeled with a the name of the glaze and a photograph of what the glaze looks like when fired.  Students are to take a new brush every time they change to a new color.  Dirty brushes are placed in water buckets at their work stations.  This is the first year I used this system.  It works really well and I definitely will be using it again for my future lessons with glaze.


Complete glazed pieces are fired and wire whiskers are added with a hot glue gun.

Examples of Student Work:


Friday, February 14, 2014

Scrumptious Cupcakes

Second Grade Art Lesson
3 Class Periods
Scrumptious Cupcakes, Second Grade Art Lesson

After teaching my lesson on Claes Oldenburg with my second graders and being inspired by a cupcake sculpture I saw on pintrest, I thought I would put a different spin on the project that we normally complete for this unit.  You can still check out all the details to my lesson on Claes Oldenburg Food Sculptures to learn about the famous artist that inspired us, the steps to the lesson and see the projects that we completed in the past.

More Scrumptious Cupcake Creations:


March is Youth Art Month


Youth Art Month (YAM) is quickly approaching.  How are you celebrating? 

Six years ago I organized an art exhibit to celebrate this very special month.  Although it is a lot of work to organize, this exhibit has been a wonderful way to share the talent of our youth, the hard work of art educators (within my district and nearby districts) and encourages the support of quality art programs for our schools. 

I cannot wait to see the excited faces of students, parents and fellow art educators.  Hands down.  One of the best parts of my job.

Thursday, February 13, 2014

Art Catch Up Time

I have been struggling lately with what to do with my elementary students that just need a little more time to complete projects.  In the past I would just grade them as is and send them home.  I often felt sad about seeing these uncompleted masterpieces knowing that if they were given just a little more time they would be spectacular pieces of art.  I thought about letting students take the work home to finish, but quickly realized that the odds of it ever making it's way back to me were slim to none and the condition it would be in after travel would be heart breaking.

So my solution started with giving my students the option to come in during their recess time to complete their art.  What I discovered, however, was that in most cases I was in the middle of teaching another class when they came in or I couldn't find their artwork in the stacks of art I had to grade or it took so much time to get the supplies they needed out for the lesson that they barely had any work time (recess is 15 minutes long at our district).

After struggling with this, the solution became so obvious I couldn't believe I didn't think of it from the beginning.  I set up a table in the back of the classroom.  At the table I have a basket labeled Art Catch UP Basket.  Students that think they are wanting to come in can place their art in the basket.  BINGO!  Each piece of art is labeled with name and class code.  I also place the date it lands in the basket on the back (anything that is over a month old is sent back home-I figure if they haven't came in to finish by then, they probably never will). I keep my eye on the projects that land in the basket and set up the supplies that are needed to complete the lesson or leave a note where they can find the materials they need in the classroom.


Student now know where to go and find their work.  This system saves time for everyone and doesn't interupt my teaching from another class.  Best of all, students are completing art and turning in the masterpieces I knew they would be all along!


Clay Whistles

Fifth Grade Art Lesson
6 Class Periods
Clay Whistles, Fifth Grade Art Lesson

Day 1:

To begin this lesson we defined the word ocarina.  An ocarina is a simple wind instrument (whistle).  We looked at a very brief powerpoint that showed examples of ocarinas and discussed the history behind this simple instrument.

Students watched the video: Whistle While You Sculpt by Paul Guion.  We paused several times during the video to discuss the steps of creating a whistle and to look more closely at the numerous ideas presented within the 13 minute DVD.


Day 2:

On the second day of this lesson we took detailed notes on the steps we viewed from the video and discussed the following vocabulary words: incising, applique, score, slip, greenware, bisqueware, and kiln.

Notes in sketchbook.

Students used the rest of the class period to brainstorm ideas for their project.


Day 3 & 4:

Students used these days to construct their whistle out of clay.  Students followed along through demonstration on how to construct the overall whistle.  Details and designs were added on their own.

All whistles were tested before allowing them to reach the greenware stage.

Day 5 & 6:

After firing in the kiln, whistles were painted with acrylic paint.  Proper brush care and amount of paint were stressed in instruction.  Students wrapped up the lesson by filling out a self-evaluation on the project.
 
Student filling out self-evaulation form.

Examples of Student Work: