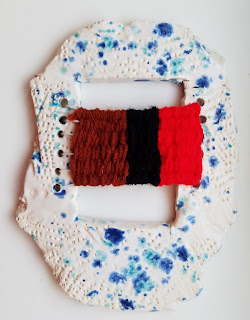
5 to 6 class periods
 |
| Clay Loom Weaving, Fifth Grade Art Lesson |
Day 1:
* Take a softball size piece of clay, wedge clay ball then roll clay so it is 1/4 inch thick. We use sticks to help us reach our desired thickness.
 |
| Rolling out clay slab. |
 |
| Creating texture. |
* The pattern for the loom is then traced and cut out.
* Holes for warp threads are placed above and below the center opening of the piece.
 |
| Cutting out pattern and creating warp thread holes. |
* Students then used a small amount of water to smooth out the edges on the loom. Name and class code was labeled on the back of the loom.
* Pieces were then set aside to dry before placing them into the kiln.
Day 2:
* Students reviewed the glazing process before glazing their looms.
* Looms were then fired for a second time.
Day 3:
* Warp the loom.
 |
| Warping the loom. |
Day 4-5:
* Weave.
Student Examples:


