Showing posts with label Sixth Grade Art. Show all posts

Friday, December 29, 2023

Clay Coil Trees

Middle School Art Lesson

5 to 6 class periods

40 minutes per class

Clay Coil Trees, Middle School Art Lesson

I tested out this project this year with my 6th grade artists.  Students were allowed to add details of their choice (it did not have to be a Christmas tree, but due to the timing of the project, most went in this direction).  Students were also allowed to choose if they wanted to paint or glaze their finished piece.  We discussed the advantages and disadvantages of each of these options.  

For a complete step by step lesson plan, reference sheet and a rubric check out my TPT store.  Thanks in advance for supporting my business by either liking my store or making a purchase.  

Crazy Busy Art Room Store

Here are some more beautiful examples from my students:


Thursday, October 29, 2020

Op Art

Sixth Grade
4 class periods
45 minutes per class
Op Art, Sixth Grade Art Lesson

Day 1:
Student are shown a YouTube video that has a fun introduction to op art, some of the famous artists of op art and many op art examples.  By the time we were done viewing it, some of my students were shaking their heads because their eyes were playing tricks on them.  Learning About Op Art.

After the video, we set to work starting our op art designs on a 12 x 12 inch piece of white drawing paper.  I have students use a circle stencil (Pringle lids work excellent for this) and trace a 3 or 4 circles anywhere they would like on their paper.  Circles may go off the paper, but they should not overlap.

Next, I demonstrate to student how create a checker board on the circle.  We discuss how we want the lines to curve in order to create a sphere look.

Students use a black sharpie marker to create the black and white checker board design in each sphere.  I have students mark lightly with a pencil the areas to color black.

Day 2:
On the second day of this lesson, I begin class with another video that shows numerous examples of op art.  Op Art Example of Victor Vasarely. After the video, using a ruler, I demonstrate to students how to create the cones in the background of the composition.  Students are shown how to create curved lines, so once again we give our cones the look of being three dimensional.

Students are given the choice to color the cones in a complementary color scheme (red/green, blue/orange, or yellow/violet).  We used crayons for this step.  

After the cones are colored, students are given a demo on how to create the highlight using an eraser on the center of the cones and adding some shadow to the edges of cone using a black crayon.  BLEND!  BLEND!
We used an eraser to erase the crayon to create the highlight down the center of the cone.

A black crayons was used not he sides of the cone to create the shadow.

Day 3:
During our third class period, students are shown how to create the wave line in the background of the composition.  They are allowed to use any two markers of their choice to color the spaces between the wavy lines.  Stress craftsmanship!
A wavy line is added to the background, outlined with a black sharpie and colored using 2 markers colors of their choice.


Day 4:  
Use this day for students to catch up on any parts of their composition they still need to complete.

Student Examples:


Sunday, September 27, 2020

Sundaes Inspired by Wayne Thiebaud

 Sixth Grade Art Lesson

3 class periods

42 minutes per class

Sixth Grade Art Lesson, Sundaes Inspired by Wayne Thiebaud

I usually do this lesson with cupcakes as our subject matter.  I bring cupcakes to class and have the students draw the cupcake from observation.  However, this year we are not allowed to bring treats to school to share due to COVID.  So I decided that I needed a new spin on this lesson and decided to do ice cream sundaes.  I printed off numerous examples and created a handout of different types of sundaes for the students to look at for reference.  They still seemed to enjoy this lesson and loved to color with the oil pastels.  They were also very excited to discover that Wayne Thiebaud was still alive today and will be 100 years old in November!  

Day 1: 

To begin this lesson, I introduce the students to artist Wayne Thiebaud.  Most of the information that I share with students can be found on this link that gives the steps to my cupcake lesson.  Wayne Thiebaud Cupcakes.

After we watch and discuss the YouTube video, student began to draw sundaes on 12 x 12 inch colored construction paper.  I give students a handout on sundaes for reference, but they are allowed to put their own creative spin on their drawings as they wish.  They are expected to incorporate a shadow in their composition and a horizon line.  Remind students to draw large.  Fill up the space!

Once the drawings are complete, I have them go over their pencil lines with a sharpie marker.

Day 2:

On the second day of this lesson, I give some tips on how to blend with the oil pastels.  I give a demonstration on how to create a glass effect using white and blue oil pastels.  We also discuss different ice cream flavors and how we could mix oil pastels to create those colors to represent the flavors we want to create.

Day 3:

This day we use to finish up coloring our creations.  I have students color the table and the shadow in their composition.  I also, demonstrate how to create highlights on different parts of the composition such as on a cherry or a spoon.  I inform students to use a black oil pastel to carefully outline pieces int the composition that need to pop out a bit.  I also, ask them to assess their back ground and if it seems to be filled with smudges and fingerprints, I advise them to consider to color the background.

Student Examples:


Tuesday, September 22, 2020

Complementary Circles Abstract Design

 Sixth Grade Art 

4 to 5 class periods (40 minutes each)

Complementary Circles Abstract Design, Sixth Grade Art Lesson

Supplies:  
12 x 18 inch paper, pencil, eraser, ruler, circle stencils, flat brushes, water buckets, liquid tempera paint, painting palettes

I can:
*  create an abstract painting.
*  use a complementary color scheme.
*  create tints and shade with paint.

Day 1:

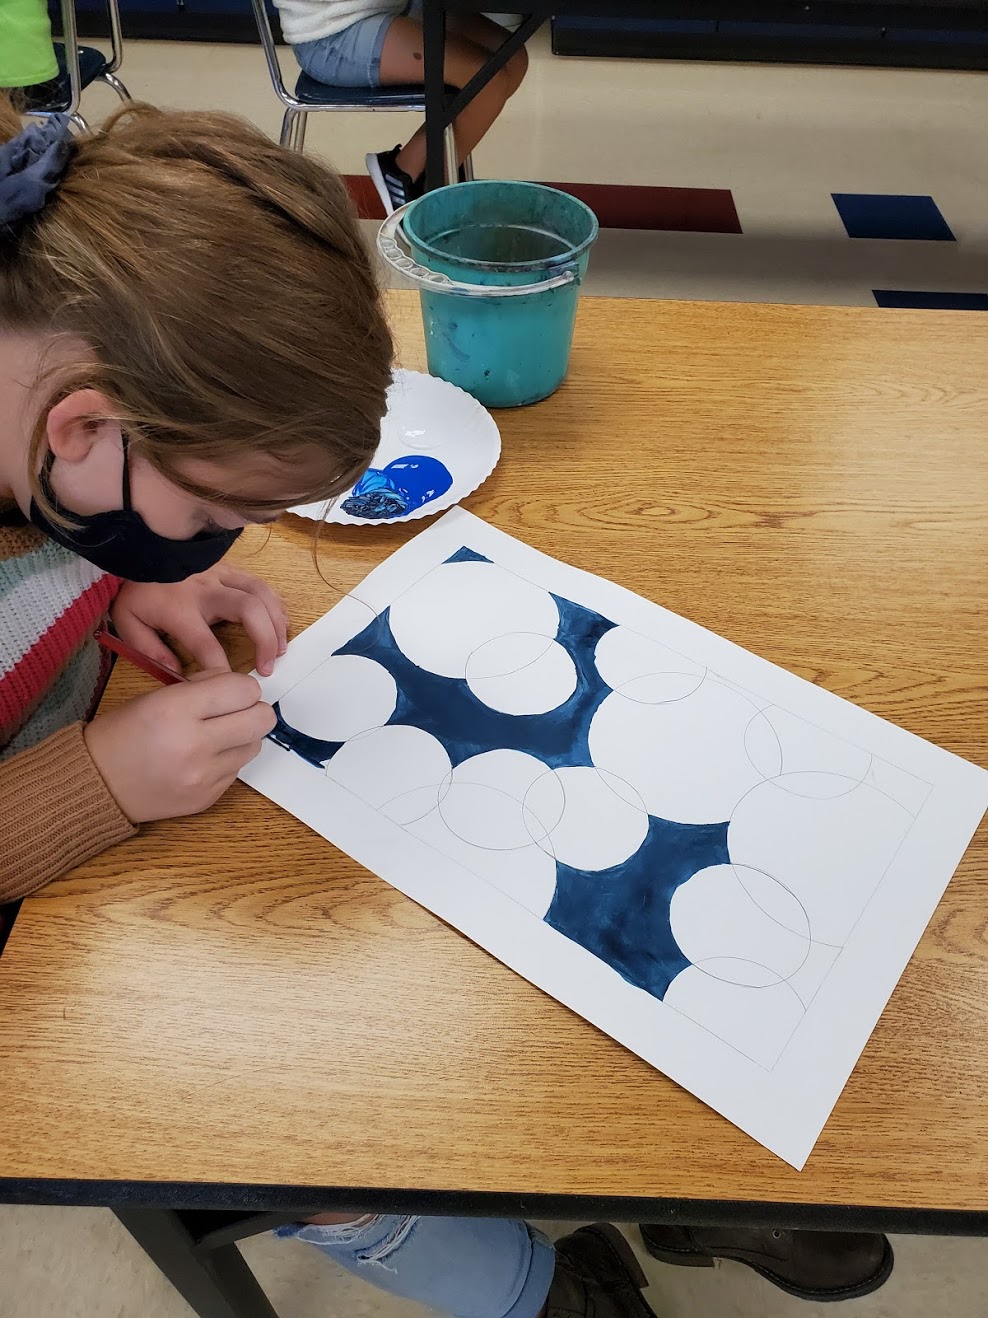
On the first day of this lesson the following vocabulary words were discussed:  abstract art, complementary colors, tints, shades, negative space and positive space.    I like having students write down their vocabulary words on the back of their assignment.  Once we were done note taking, we created a border on our 12 x 18 inch paper using a ruler.


Border around 12 x 18 inch paper.

Using some circle templates (lids work well for this) have students trace circles into their composition.  I had them draw 4 to 5 large circles and 8 to 9 small circles.  Circles can overlap or look like they are entering or leaving the composition.  Circles should not go outside the border area.


Circles added in the composition.

If class time allows, have student take one of the colors of their complementary color scheme and create a shade with it.  I demonstrate to student how to carefully add black to the hue.  You want to add a tiny bit at a time so that the color does not get too dark too fast.  Using this color, students may begin to paint the negative space within the composition.

Painting the negative space.

Negative space completed.


Craftsmanship is highly stressed for this lesson!

Day 2:

Students begin class by finishing the negative space of their backgrounds.  I made sure students paid attention to how they mixed the color the class before so they could mix it again if they needed to.  

Next, I have students count the number of spaces they have left to paint in their composition and divide that number in half.  Example, if a student says they have 20 spaces on their paper to paint, I inform them that they will be painting 10 spaces today.  

Using the same complementary hue as the previous class students are now shown how to create tints.  For the remainder of the class period they paint the circles and parts of the circles using shades and tints of that hue.  Remind students to leave some circles white for the complementary color's opposite hue (that will be done during the next class period).

Tints and shades being added to circle composition.

Day 3:

Today we use the complementary color's opposite to paint the remaining circles.  Students once again create tints and shades of this color.  If they finish, they can go back and paint any areas that they did not complete from the class period before.


Project completely painted with tints and shades of both complementary colors.

Day 4 and Day 5:

Depending on how slowly your class works you may need an additional day for painting.  The very last step is to outline with black paint 6 circles.  I inform students that these may be circles that seem a bit messy to you and would look better if they were touched up a bit.

Black outline added to 6 circles.

Again, stress craftsmanship for this lesson.  I found this lesson to be very relaxing and peaceful.  Student love to mix paint!  You could hear a pin drop they were so quiet concentrating on being careful with their brush.

Student Examples: