Kindergarten
3 Class Periods
50 minutes per class
Rainbow Rooster, Kindergarten Art Lesson
Day 1:
On the first day of this lesson we begin class with a bit of color review. Students have already had multiple lessons on primary colors, secondary colors and have discussed warm and cool colors. I show this short YouTube clip to help with our review. The Color Wheel
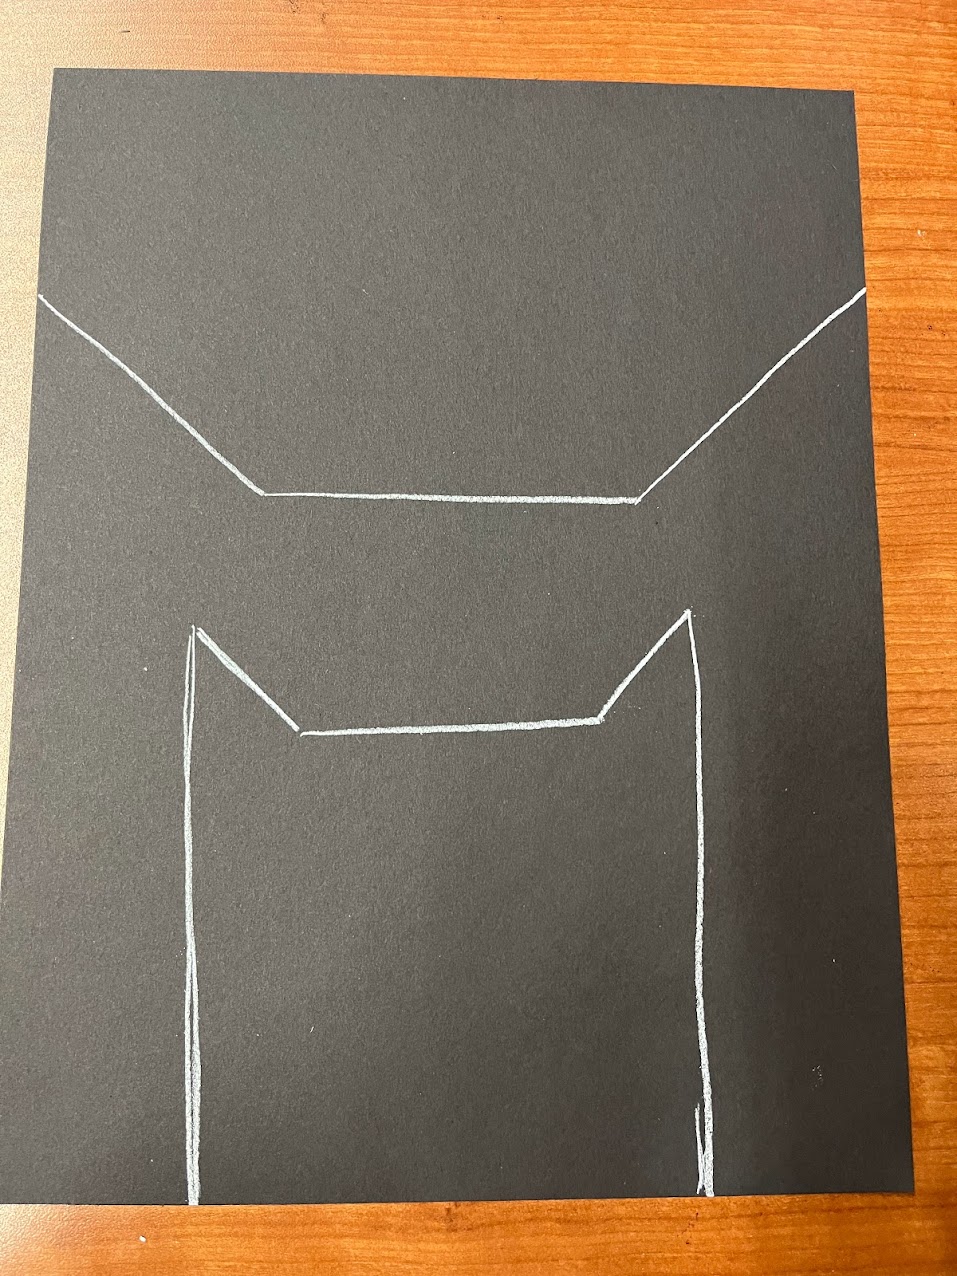
Next, students are given a 12 x 12 inch square of white paper. Make sure students write their name on the back before painting. Using sponges we paint a yellow horizon line on our paper. We paint the top half of our paper yellow. I remind students to "dab" versus "swipe" with the sponge.
Once most of the class is finished, I tell them to paint the bottom half yellow and demonstrate how to immediately dab blue on top of the yellow they just painted. Students get quite excited to see the yellow and blue paint mix to create green.
Finally, we take red and paint a few rows on our horizon line. This will create what may look like bushes or flowers in the background. Students may see the paint turn purple orange and brown in this area depending on how they dab the paint.
Day 2:
I start his class with a story about chickens. We examine the pictures and look at the body parts that we will be creating on this day with our paper.
Students are given a piece of newspaper that has been cut to 6 x 6 inches . Students are told to cut the bottom corners off of the square. They are then shown how to draw a curved line on the top of the newspaper. Students are instructed to cut on the line and then glue the body of our chicken to the center of their compositions.
Students were given 2 squares of paper (white 1 x 1 inch and orange 2 x 2 inches). They were shown how to cut a circle for the eye and a triangle piece for the beak. After the pieces were glued on, students took a sharpie marker to pop out the details in the eye and beak.
Next, students are given a red piece of paper roughly 1 x 1 inches. Students are instructed to cut the paper in half. On one half they are shown how to draw a tear drop shape to create the wattle on the rooster. This is cut and glued underneath the rooster's beak. On the second piece of paper, students are shown how to create a zigzag line to create the comb for the rooster's head. This is then cut, measured to fit the head and glued into place.
Time to make the legs. Each student is provided with a piece of orange paper that is 1/2 inch by 4 inches. Students are shown how to cut the piece of paper into 2 skinny strips. We measure and then cut the legs to fit on our paper. Save the orange scraps to make the toes! Each scrap is cut into smaller sections to create the toes. All the pieces are glued in place. Using a sharpie marker, details are added to the legs and toes.


Add details using a sharpie marker. Don't forget those talons!
Day 3:
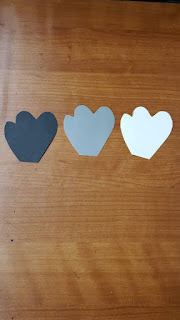
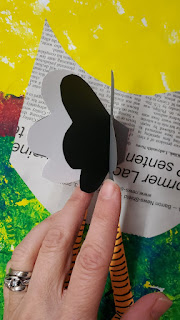
On the third day students are introduced to neutral colors. We only use black, white and gray for this step, but you could also incorporate brown if you wish. I give each student a wing pattern that they trace on a 3x3 inch square of black, white and gray paper. After tracing, students cut out the wings. They are shown how to glue them on the edge and fold them so they pop off the paper.
Next, we discuss the colors of the rainbow (ROYGBIV). I have 2 1/2 x4 inch construction paper cut in the colors of the rainbow. Each students grabs one piece. I then demonstrate how to draw a skinny rainbow on each piece. Students then glue the mini skinny rainbow to the tail. I encourage them to glue them in the order, but in the end it is their masterpiece, so I don't get too upset if they do it in a random order as long as they use all the colors.
Overall, just have fun with this cute project. When I first started this project we create a chicken and I called it Whimsical Chicken. You can check out the link here. Whimsical Chicken. As you can see the project as morphed quite a bit. That is what makes teaching so much fun!
Examples of Students Art: