Friday, November 15, 2013

Gustav Klimt's The Cradle

First Grade Art Lesson
3 Class Periods


Gustav Klimt's The Cradle, First Grade Art Lesson

About the Artist:
Gustav Klimt was born in Austria in 1862.  His family was very poor.  His father provided the little income they had by being a gold engraver.  Gustav was passionate about art early on in his life.  His parents managed to save enough money to send Gustav to art school.  Klimt's art style is known as Art Nouveau.  His work can usually be characterized by his love of patterns, colors, swirling designs and gold paint.  The artist passed away in 1918.


Artist Gustav Klimt.

The piece that we examined closely by Gustav Klimt is known as The Cradle or Baby. It is an oil painting that he created in 1918.  As a class we discussed the colors and patterns that we saw in the painting.  Students were asked reflective questions about the piece.  Why is it called The Cradle?  What do you think inspired Gustav to paint such a picture?  Do you like this piece of art?  Why or why not?  If you owned this masterpiece, where would you hang it in your house?  Why do you think Gustav loved using gold paint in his paintings?


The Cradle by Gustav Klimt.

Day 1:
Students viewed power point presentation on artist Gustav Klimt and his masterpiece The Cradle.  After discussion students completed a step by step drawing of their version of The Cradle.

A small piece of tan construction paper was used as the head for the baby.  The blankets were drawn around the head once it was glued in place.

Patterns and designs were placed within each different section of the blanket.  Students were allowed to use pencil or sharpie marker for this step.  Patterns and designs could be created free hand or with a stencil.

Student adding pattern to Cradle composition.


Day 2:
Students continued to place designs and patterns within the blanket of the composition. 

Students were allowed to use crayons, markers, and colored pencils to color the designs within the blanket.  Color patterns were stressed.
Coloring patterns in composition.

Day 3:
Students reviewed what they knew about the artist and lesson so far.  Who Will Tuck Me in Tonight? by Carol Roth was read to the class.

Students that needed to finish coloring did so before moving on to the following steps.

Students were given various scraps of printed paper (wrapping paper, old wall paper, scrapbooking paper,etc.).  Three to four pieces were cut out in various shapes and added to the blankets.  Students were reminded not to cut too large of pieces.  We did not want to cover up completely all the hard work they had put forth on their designs.

The finishing touch was to add gold paint to the background.

Student Examples:


*This lesson was inspired by Gustav Klimt Crazy Quilt lesson printed in the book Dynamic Art Projects for Children.
 

Complementary Bugs

Second Grade Art Lesson
2 Class Periods
Complementary Bugs, Second Grade Art Lesson
 
Day 1:
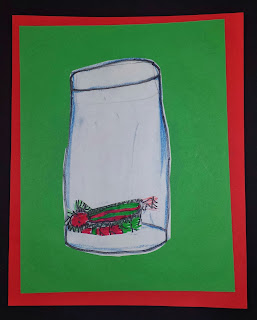
Glass jars of various sizes were placed on the art room tables.  Students were instructed to use their eyes and draw the glass jar.  A demonstration was given to students on how to keep their eyes on the object, with taking only mini breaks to look at their paper while drawing.  Many students were surprised at how well they were able to draw a "see through" object.

Jars were outlined with a black sharpie marker.  Blue chalk was gently rubbed over the drawing to create a glass-like appearance.


Student completing an observational drawing of a glass jar.

A second piece of paper was used to draw a bug.  The bug could be real or completely made up.  Students had to make sure the bug fit inside their jar by measuring it while they worked.

The jar drawing and the bug were stapled together and stored until the next class session.


Day 2:
We began the second day of our lesson by discussing complementary color schemes.  Complementary colors are colors that are opposite on the color wheel.  Students learned that these colors "say nice things" and look fantastic when placed next to each other.  The complementary color schemes we discussed in class were blue and orange, yellow and violet and red and green.

Students were instructed to pick one of the complementary color schemes to complete their project.  The bug they created the day before had to be colored in the scheme they selected.  They could use markers, crayons, or colored pencils to color their bug.

Once the bug was colored, students bubble cut their jar and bug.  The bug was glued on the jar.  Blue chalk was once again rubbed lightly on top of the bug to give the illusion of it actually being inside the jar.

The jar was glued to a piece of construction paper and then matted again with the complementary color of the first piece of paper.

Student Examples:


Autum Trees in Worm's Eye View Perspective

Third Grade Art Lesson
3 Class Periods
Autumn Trees in Worm's Eye View Perspective, Third Grade Art Lesson

Day 1:
Students began this lesson by imagining what the world may look like if they were a worm.  Students were asked to lie on their bellies on the floor of the classroom.  Students were allowed to raise their heads but not their shoulders off the floor.  Students were instructed to use their eyes and think about the following questions. What did they see?  What details could they see now, that they never knew existed before (objects on floor)?  How far up can you see?  What does the ceiling look like?  Is it hard to focus on?  What do you notice about the tables and chairs in the classroom?  Can you see on top of the table?

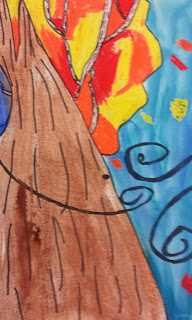
After our "worm" exercise, students completed a follow along drawing of a tree in a worm's eye view perspective.  Students were reminded that the lower part of the tree trunk should be larger than the top part of the tree.  Objects closer to the viewer "worm" should appear larger, objects further away should be smaller.

The compositions were outlined with a black sharpie marker.  Wind swirls were added and drawn thicker to show emphasis in the drawing.
Student working on outlining composition.
Day 2:
On the second day of class, students reviewed their discoveries from the "worm" exercise from the class period before. 

Students used texture plates to color in the tree trunks with a brown crayon. 

Oil pastels were used to color in the leaves.  Blending of colors were discussed.  Students were allowed to add leaves falling if they wished.  Students were reminded that the closer the leaf fell to the worm the larger it would be.
Coloring tree trunk.
Day 3:
Students finished up any tasks from the class period before that they did not have time to complete.  Tempera paint was used to paint the sky and go over the trunk.

Examples of Student Work: