2 Class Periods
 |
| Complementary Bugs, Second Grade Art Lesson |
Glass jars of various sizes were placed on the art room tables. Students were instructed to use their eyes and draw the glass jar. A demonstration was given to students on how to keep their eyes on the object, with taking only mini breaks to look at their paper while drawing. Many students were surprised at how well they were able to draw a "see through" object.
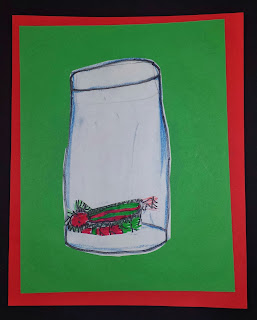
Jars were outlined with a black sharpie marker. Blue chalk was gently rubbed over the drawing to create a glass-like appearance.
 |
| Student completing an observational drawing of a glass jar. |
A second piece of paper was used to draw a bug. The bug could be real or completely made up. Students had to make sure the bug fit inside their jar by measuring it while they worked.
The jar drawing and the bug were stapled together and stored until the next class session.
Day 2:
We began the second day of our lesson by discussing complementary color schemes. Complementary colors are colors that are opposite on the color wheel. Students learned that these colors "say nice things" and look fantastic when placed next to each other. The complementary color schemes we discussed in class were blue and orange, yellow and violet and red and green.
Students were instructed to pick one of the complementary color schemes to complete their project. The bug they created the day before had to be colored in the scheme they selected. They could use markers, crayons, or colored pencils to color their bug.
Once the bug was colored, students bubble cut their jar and bug. The bug was glued on the jar. Blue chalk was once again rubbed lightly on top of the bug to give the illusion of it actually being inside the jar.
The jar was glued to a piece of construction paper and then matted again with the complementary color of the first piece of paper.
Student Examples:


No comments:
Post a Comment