
How to Create a Cereal Box Art Journal

Materials Needed:
Cereal box
12 x 18 inch paper (We used construction paper, but you could use gift wrap, wall paper, etc.)
Inside paper 7 1/2 x 9 1/2 inches (single sheets) or 15 x 9 1/2 inches folded
Paper for inside cover 15 1/2 x 9 1/2 inches
Clothes pins
Glue
Stapler and staples (We used a Japanese binding stitch in class).
Steps:
1. Open up the cereal box along the side seam.

2. Refold down the center of the side that does not have the seam.

3. Cut the folded box into an 8 x 10 inch rectangle.

4. Center the flattened cereal box to the 12 x 18 inch cover paper. Glue together.

5. Fold and glue the sides and corners of the construction paper to the inside of the cereal box.

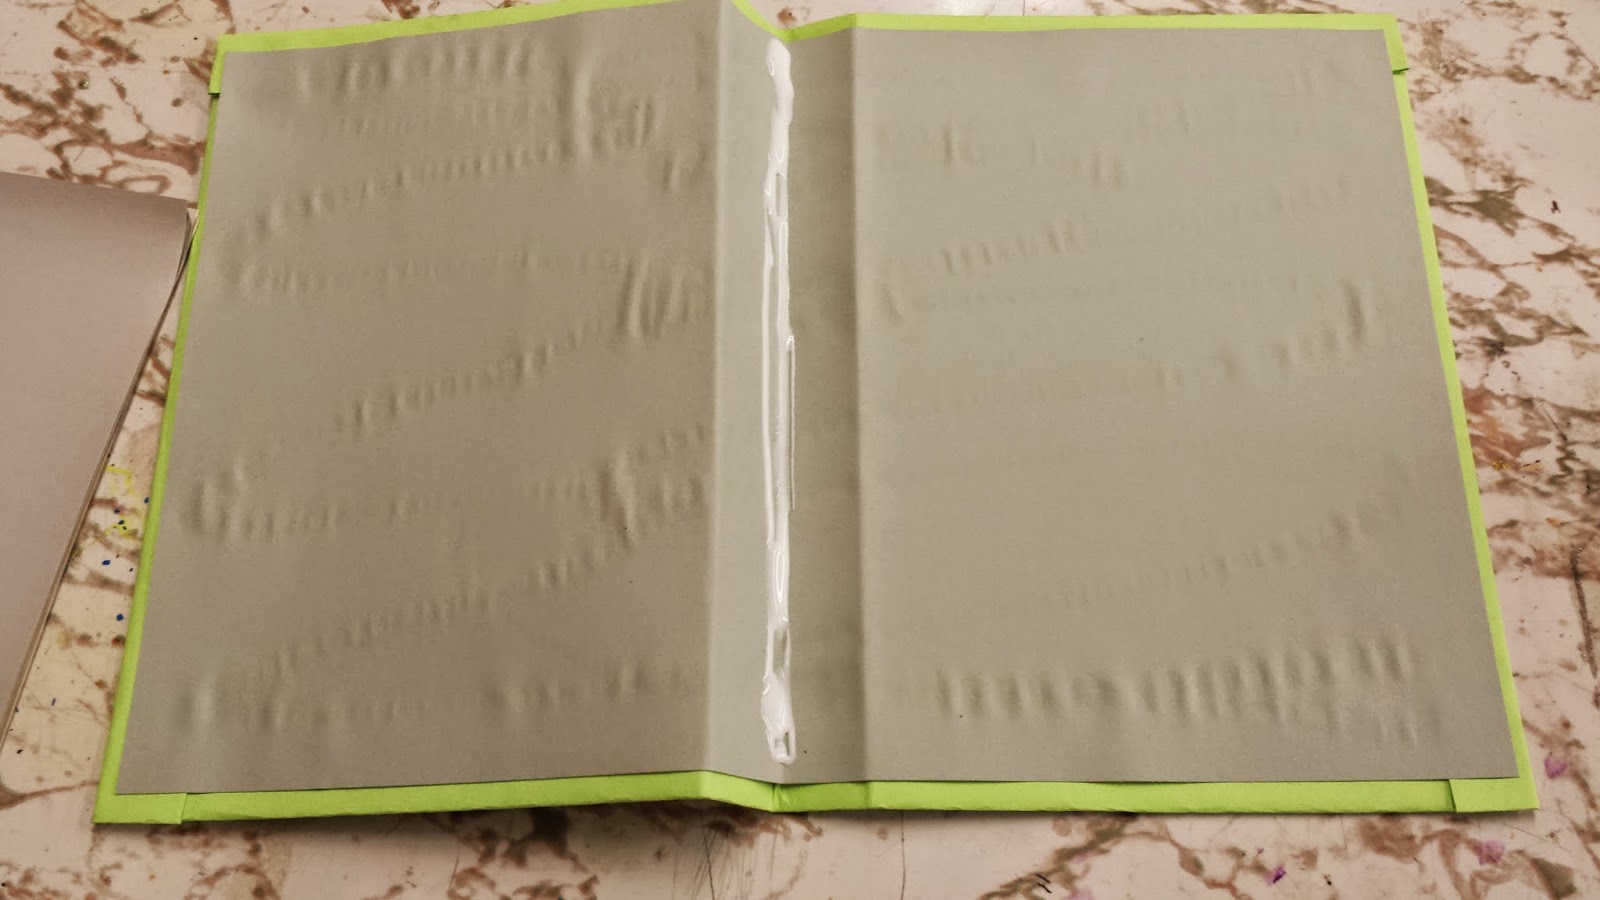
6. Next glue the paper for inside cover (15 1/2 x 9 1/2 inches) on the inside of the cereal box to cover the cardboard and the folded edges from the cover.

7. Let sketchbook dry a moment or two before moving on to the next step.
8. Fold the cover in half. Now fold each side back along the side seam to create a "V" shape in the middle.

9. Count out the pages you want for the inside and staple pages together. (For our sketchbook we used 15 to 20 pieces of single paper. We did not staple the pages due to the fact we did a Japanese Binding Stitch instead).
10. Put glue into the "V" and add the stapled end of the paper stack.

11. Put clothes pins on the ends to help hold it while drying.

12. Once dry, remove clothes pins and SKETCH!

No comments:
Post a Comment