Wednesday, September 25, 2019

Marker Recycling

The Colorcycle program initiated by Crayola has been around for a few years (2013).  However, I did not really hear about this program until two years ago, and last year when a parent mentioned it to me, I thought to myself I better look into it.  After doing a little research on the Crayola
Colorcycle program I decided that it looked easy enough to do.

Here are the basic steps:

Step 1:  Register on the Crayola Colorcycle web page.

Step 2:  Inform students, teachers, parents and community members about the colorcycle program.

Step 3:  Start collecting dried up markers.

Step 4:  Box markers.

Step 5:  Print shipping label from Crayola Colorcycle website.

Step 6:  Drop off at post office.

I shared the following video with my students to help them understand what was going to happen to the dried up markers. What Happens to Our Markers When We Recycle Them?  Student became quite excited after we discussed the video.

I hope this blog entry inspires some of you to give marker recycling a try in your classroom.


Tuesday, September 24, 2019

2019-2020 School Year

I can barely believe that another summer as come and gone.  Welcome back to school letters have been sent home and I find myself starting my 13th year at the Cameron School District and beginning my 17th year teaching in total.

There are moments when I feel like a first year teacher.  Nervous butterflies, wondering what the year will bring, learning new names and using my creative energy to figure out how I want to set up my classroom for the school year.

Then there are moments, when I also realize that I have been doing this for quite awhile.  Going over classroom procedures and expectations, making seating charts (after having the same students for several years in a row, I definitely know who can sit next to whom), sitting in the never ending first day inservice meetings and just overall having the confidence of knowing what projects I will be starting with for the school year.

I have lots of plans for the school year, one of the main ones is reconnecting with my students.  Last year I really got wrapped up in the whirlwind of having 565 students.  So much grading!  Two different schedules (6 day rotation in the elementary - 4 day rotation in the middle school)!  I felt like I was on never ending amusement park ride.  I have decided not to grade every assignment this year.  I have been working with administrators to help ease my crazy schedule.  I am going to try to go with the flow more and not get hung up on deadlines and due dates for projects, especially at the elementary level.  I want to talk to my students more.  I want to know more about their lives and what is happening at home.  I want to sit and make art with my students.  This is the school year where I take a deep breath and refocus on why I wanted to become an art teacher in the first place.

Wishing you all an incredible school year!

Love,

Mrs. Cornell

P.S.  I am going to try and be better at blogging this year as well.  My goal is bi-weekly updates.  :)

Wednesday, July 10, 2019

Monster Stomp

Third Grade Art Lesson
4 Day Lesson
Monster Stomp, Third Grade Art Lesson

Day 1:
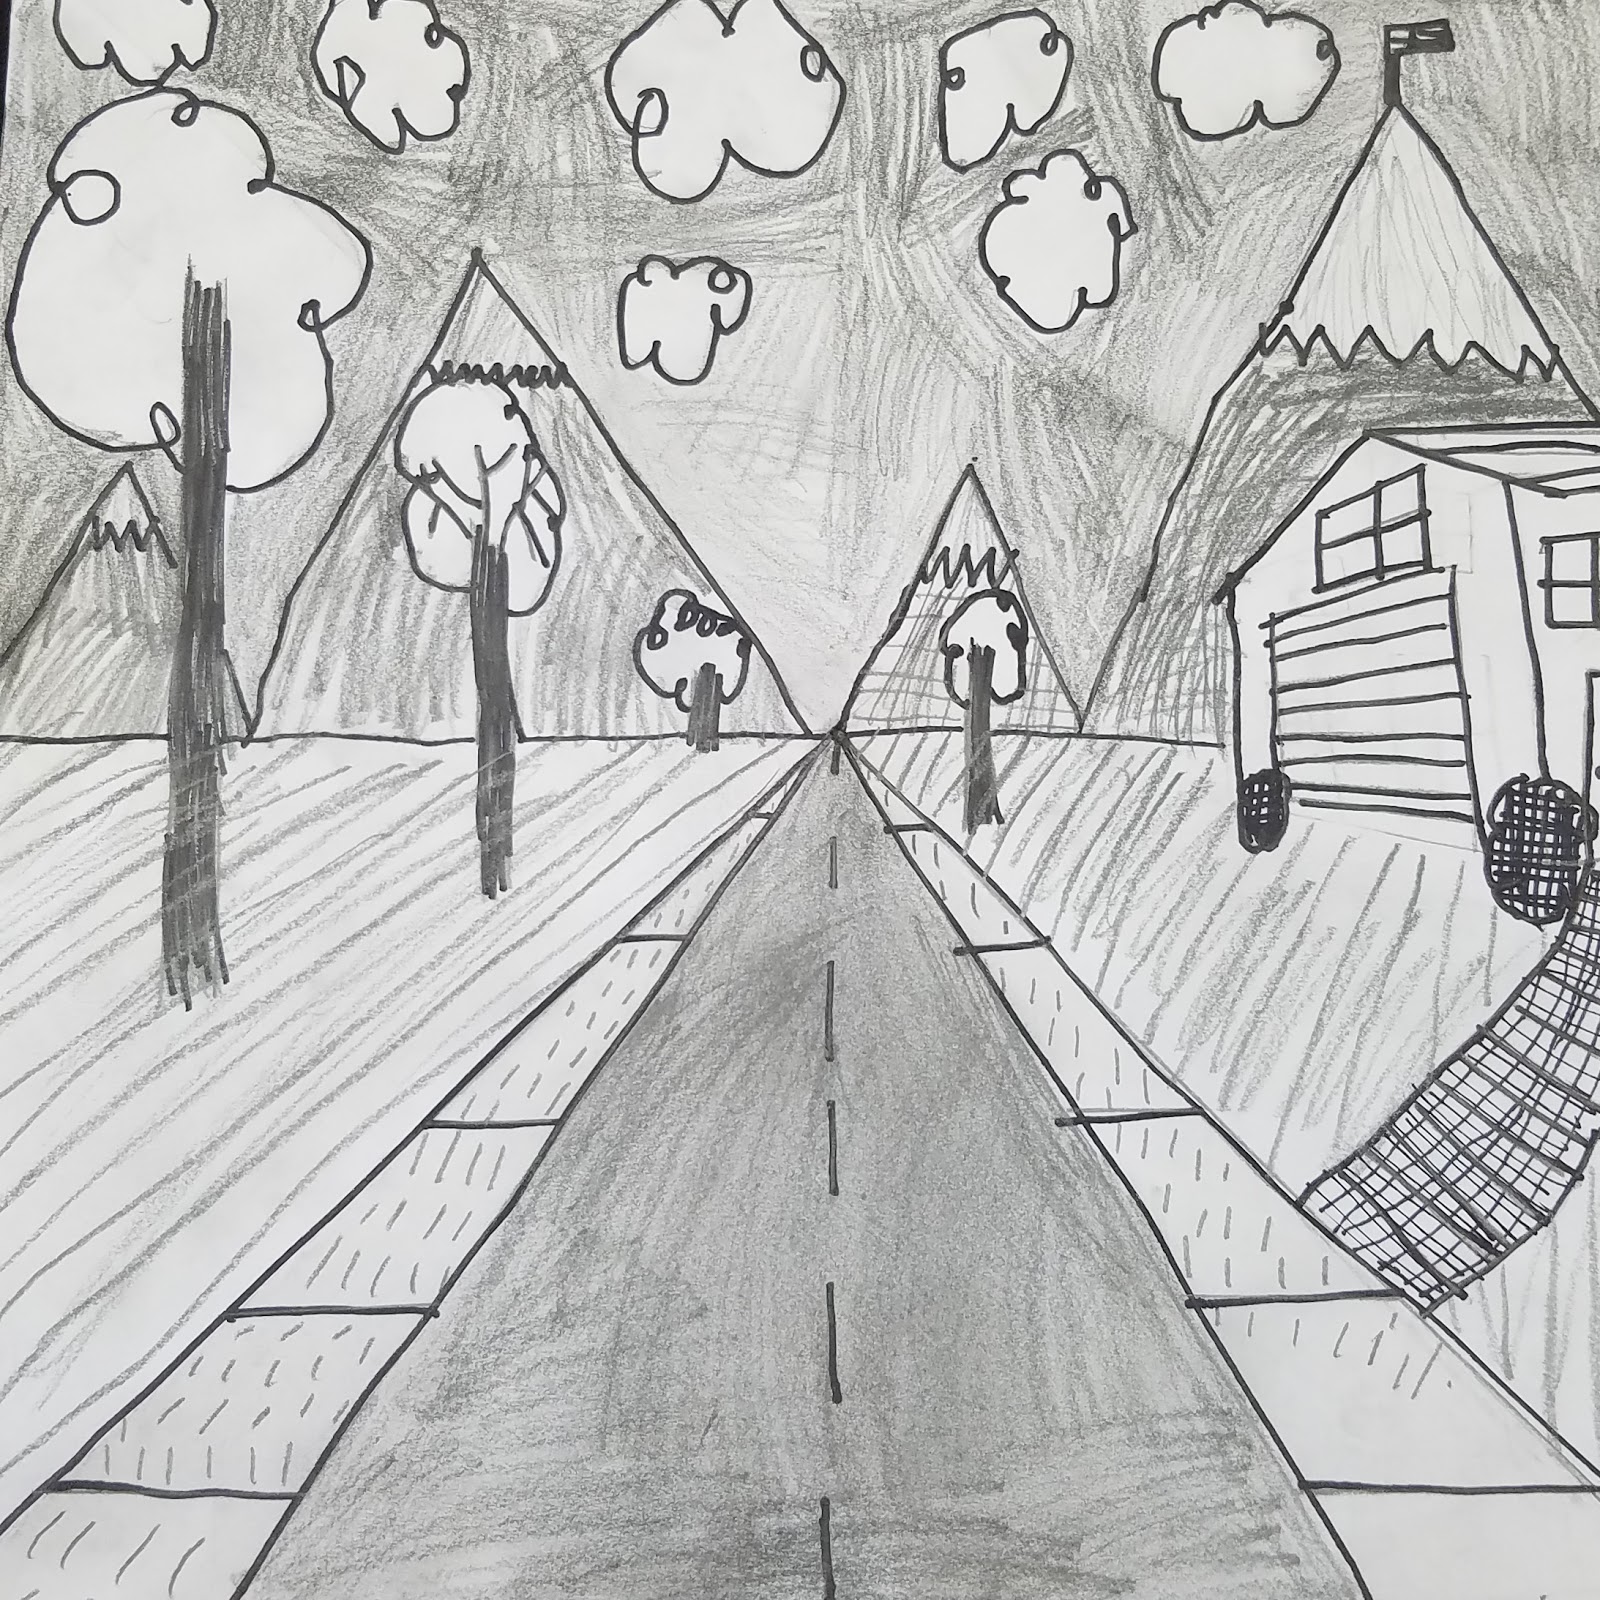
On the first day of this lesson, students participated in follow along instruction on how to draw a landscape with one building in one-point perspective.  Our goal for day one was in have the vanishing point, road, sidewalk, building and horizon line in place.

Day 2: 
During our second day of this lesson, students reviewed the vocabulary that was used the previous class (one-point perspective, horizon line, vanishing point, horizontal line, vertical line, diagonal line, parallel lines).  Students added trees to their composition and then were shown through follow along demonstration, how to place windows and doors in the correct perspective in their building.  Students were allowed to use their creativity to incorporate extra details such as mailboxes, air planes, signs, etc. to their composition.

Day 3:
We began this class with a discussion on shading.  This is the first grade that I begin to discuss shading techniques with students.  I had students start with a practice worksheet on hatching, cross-hatching, and stippling.  Students practiced creating a value scale with these techniques as well as with a number 2 pencil and a charcoal pencil.

After the practice worksheet, students spent the remaining classroom minutes to shade their compositions using any of the techniques we discussed in class.  I informed them that I would be looking for multiple value ranges within their compositions.

Student working on shading composition.

Example of project at the end of Day 3.


Day 4: 
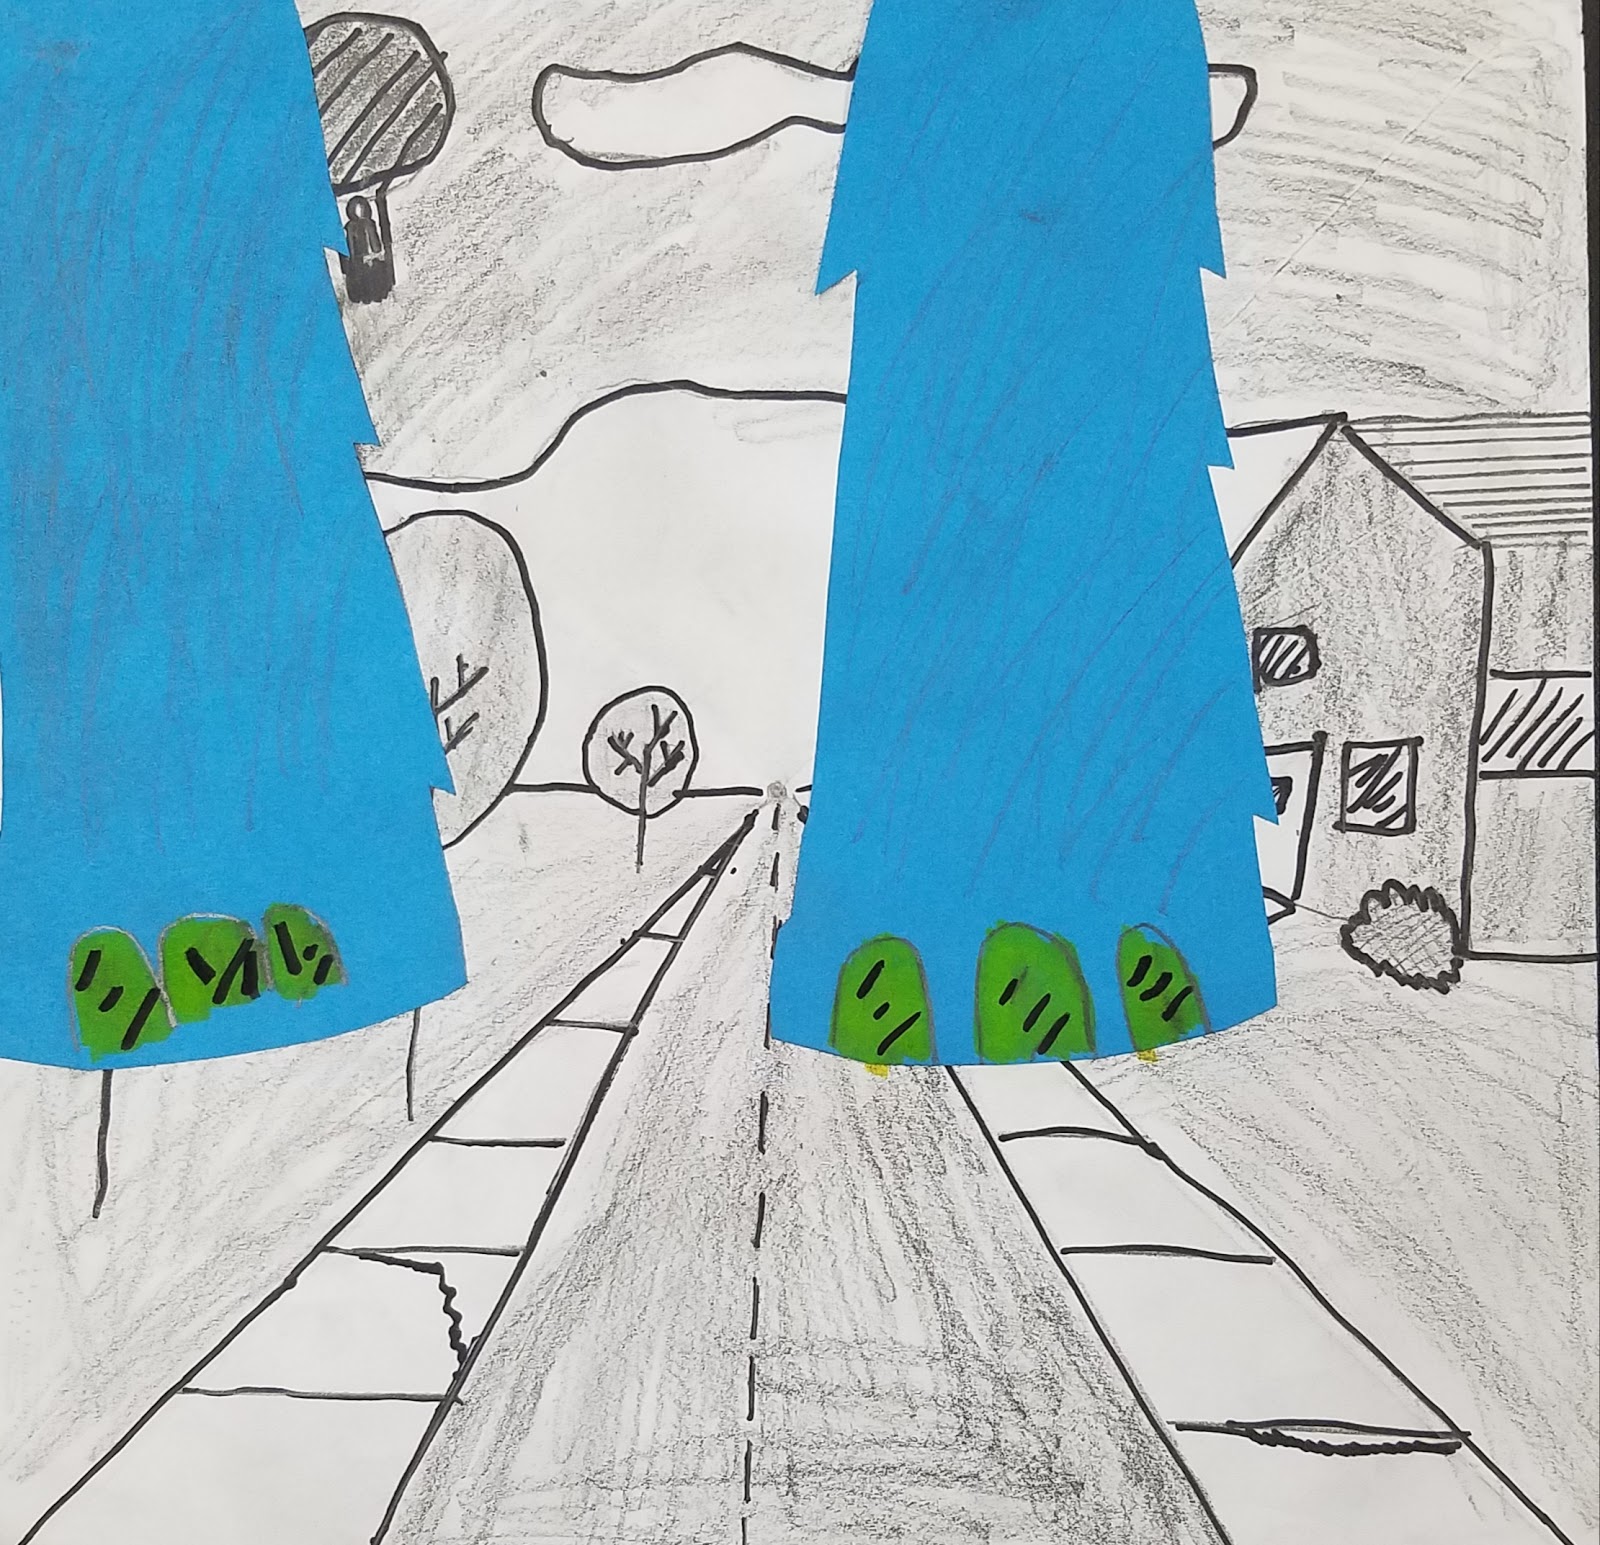
For an added twist on our one-point perspective drawing unit, I thought it would be interesting to add a pair of monster feet stomping into our landscape.  I planned out several monster feet patterns for the students to use, however they were also allowed to create their own if they were so inclined to do so.  Details were added to these feet once they were glued into the composition.

I did discuss with students that if one foot was higher than the other in the composition they should include the shadow of where the foot was about to stomp.  You may also want to remind students that the top of the monster's legs need to be flush with the top of their paper, so it looks like the monster is stepping into the composition and not magically appearing without a body.

Student planning for the addition of monster feet for her composition.


Student Examples:


Monday, April 8, 2019

If the Dinosaurs Came Back Magnets

Second Grade Art
1 class period
If the Dinosaurs Came Back Magnets, Second Grade Art Lesson

As you all know, sometimes you get a donation for the art room that is too good to turn away, but at the same time leaves you wondering how on earth are you going to use this in your art room or try to incorporate it into your curriculum. 

I was given a generous donation of a large roll of magnetic sheet.  I decided to unroll the sheet and cut it into 5 x 5 inch squares.  The magnet sheet is very thin, so I was able to do this very easily on the paper cutter.

Day 1

To begin this lesson I read the story, If the Dinosaurs Came Back by Bernard Most.  We discussed the dinosaurs we saw in the book and the contrast of the pictures.  To pump up this lesson and fit it better into my curriculum we also discussed the concept of cityscapes.  Vocabulary Discussed: cityscape, horizon line, foreground, background, middle ground, overlapping.

Students were given some ideas and tips on how to create dinosaurs and how to place them in a modern day environment.

These projects turned out wonderful!  Students were also super excited that it could be taken home and put on the fridge right away.

Examples of Student Work:


Mouse Paint New Spin

Kindergarten
2 class periods

Mouse Paint, Kindergarten Art Lesson


Day 1:

On the first day of this lesson we explored the primary colors and discussed the color wheel.  Together as a class we read the story White Rabbit's Color Book by Alan Baker. 

Students took a 9 x 12 inch piece of paper and folded it in half.  (Don't forget to have students write their name on the back).  Students were then instructed to paint on one half of the paper with liquid tempera (only the primary colors were used).  After the paper was painted, it was folded in half and rubbed.  When students opened their papers back up, they took great delight in seeing how the paint mixed to create the secondary colors.

Paintings were set on the drying rack to dry.

Day 2:

On the second day of class, students heard the story Mouse Paint by Ellen Stoll Walsh.  I informed the class that today we would be creating a mouse inspired by the book we just read.

Students had the choice of red, blue or yellow construction paper pre-cut in 6 x 9 inch pieces.  Students glued this to the center of their painting.

Next students were given brown strips of paper, scrap pieces of yellow, blue and red paper and a small piece of aluminum foil to create their paint brush.

Adding the paint brush to the composition.

A 3 x 4 inch white piece of paper was given to each student.  The corner were trimmed to create an oval shape for the mouse body.

Small pieces of beige paper were given to cut the ears and tail from.


Creating the mouse body.

A black sharpie marker was used to add eyes, a nose and whiskers for this cute little mouse.

Examples of Student Work: