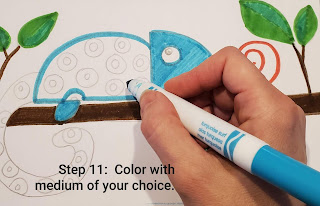
Good morning friends! Today we are going to be making a chameleon. I only drew one on my paper, but you could draw a whole jungle full of them if you like.
Remember this is the last prompt for this week. After or mini Easter break, we will pick back up on Monday at 10am.
I have attached photos with brief instructions. I encourage you to read through all the directions listed below for any further instruction on steps or creativity options.
Supplies Needed: paper, pencil, eraser, medium of your choice (markers, colored pencils, paints, crayons)
Step 1: Draw an "L" in the center of your paper with a pencil.
Step 2: Connect the ends of the "L" with a curved line.
Step 3: Draw a curved line to create the body. This should start at the back of the chameleon's head.
Step 4: Draw a horizontal line to create the belly. Add 2 small ovals to make the front and back legs.
Step 5: Add a swirl line to create the tail.
Step 6: Double the swirl line to make it thicker.
Step 7: Add an eye and a tongue.
Step 8: Add 2 horizontal lines under the chameleon to create a tree branch for him to rest on.
Step 9: Add leaves to your branches.
Step 10: Add a pattern of your choice to your chameleon's body. A pattern is a design that repeats. What pattern will you come up with? Will it be flowers? Will you use zig-zag lines? Hearts? Rainbows? I can't wait to see what you come up with.
Step 11: Color your picture using the medium of your choice. I used markers and a bit of colored pencil for mine. What will you use?
I know Easter will be a bit different this year for many of you. In my household there will be fewer people for starters. We will still have our traditional egg decorating contest, but this year it will have to be done virtually versus in person. Hang in there everyone.
Hugs to you all.
Love,
Mrs. Cornell
Mrs. Cornell


No comments:
Post a Comment