

Supplies Needed: 2 pieces of paper, pencil, eraser, crayons, markers, watercolor paints or construction paper, glue and scissors.
I do not have access to construction paper right now due to the quarantine, so for this lesson I had to paint my paper to get the colors I need for this project. If you have construction paper you can skip steps 1-8.
Step 1: Draw a line to divide a piece of paper in half. The paper should be horizontal. Refer to photo for help.

Step 2: On one half of the paper, draw a line to divide that section in half. Refer to photo for help.

Step 3: Now divide one of these boxes in half by drawing another line. Refer to photo for help.

Step 4: Finally, draw one more line to divide on the lat boxes created in half. Refer to photo for help.

Step 5: Paint the largest box a color of your choice. This will be your bird's body. If you are using construction paper, pick out a color of your choice for your bird.

Step 6: Paint the 2nd largest box a color of your choice. This will become the wings and tail of your bird. If you are using construction paper, pick out a second piece of paper for the wings and tail.

Step 7: Paint the 3rd largest box green. If you have construction paper, you will need a piece of green for the leaves of the nest.

Step 8: Paint one of the smaller boxes orange, leave the other box white. If using construction paper you will need a piece of orange and white paper for the beak and eggs.

Step 9: On your second piece of paper, use crayons to create multiple circles. Draw circles fast. We are making the bird's nest.

Step 10: Keep adding colors. Make the nest beautiful like a rainbow.

Step 11: If you created painted paper, but apart the square you painted. Make sure paint is dry. If using construction paper skip this step.

Step 12: Take the green paper. Draw a leaf on the paper. I used a black marker to do this so you can see it better. It is fine if you want to draw yours with pencil.

Step 13: Cut out the leaf and glue it to the outer edge of the nest. You choose where you want to place it.

Step 14: On the largest square you painted, draw a half circle to create the bird's body. If you are using construction paper, do this on the color you selected for the bird. Feel free to add a circle to create an eye for your bird.

Step 15: Cut out the bird's body and glue it to the nest. Make sure your bird fits in the nest. If it is too big, you may have to cut it down a bit or make the nest larger with your crayons.

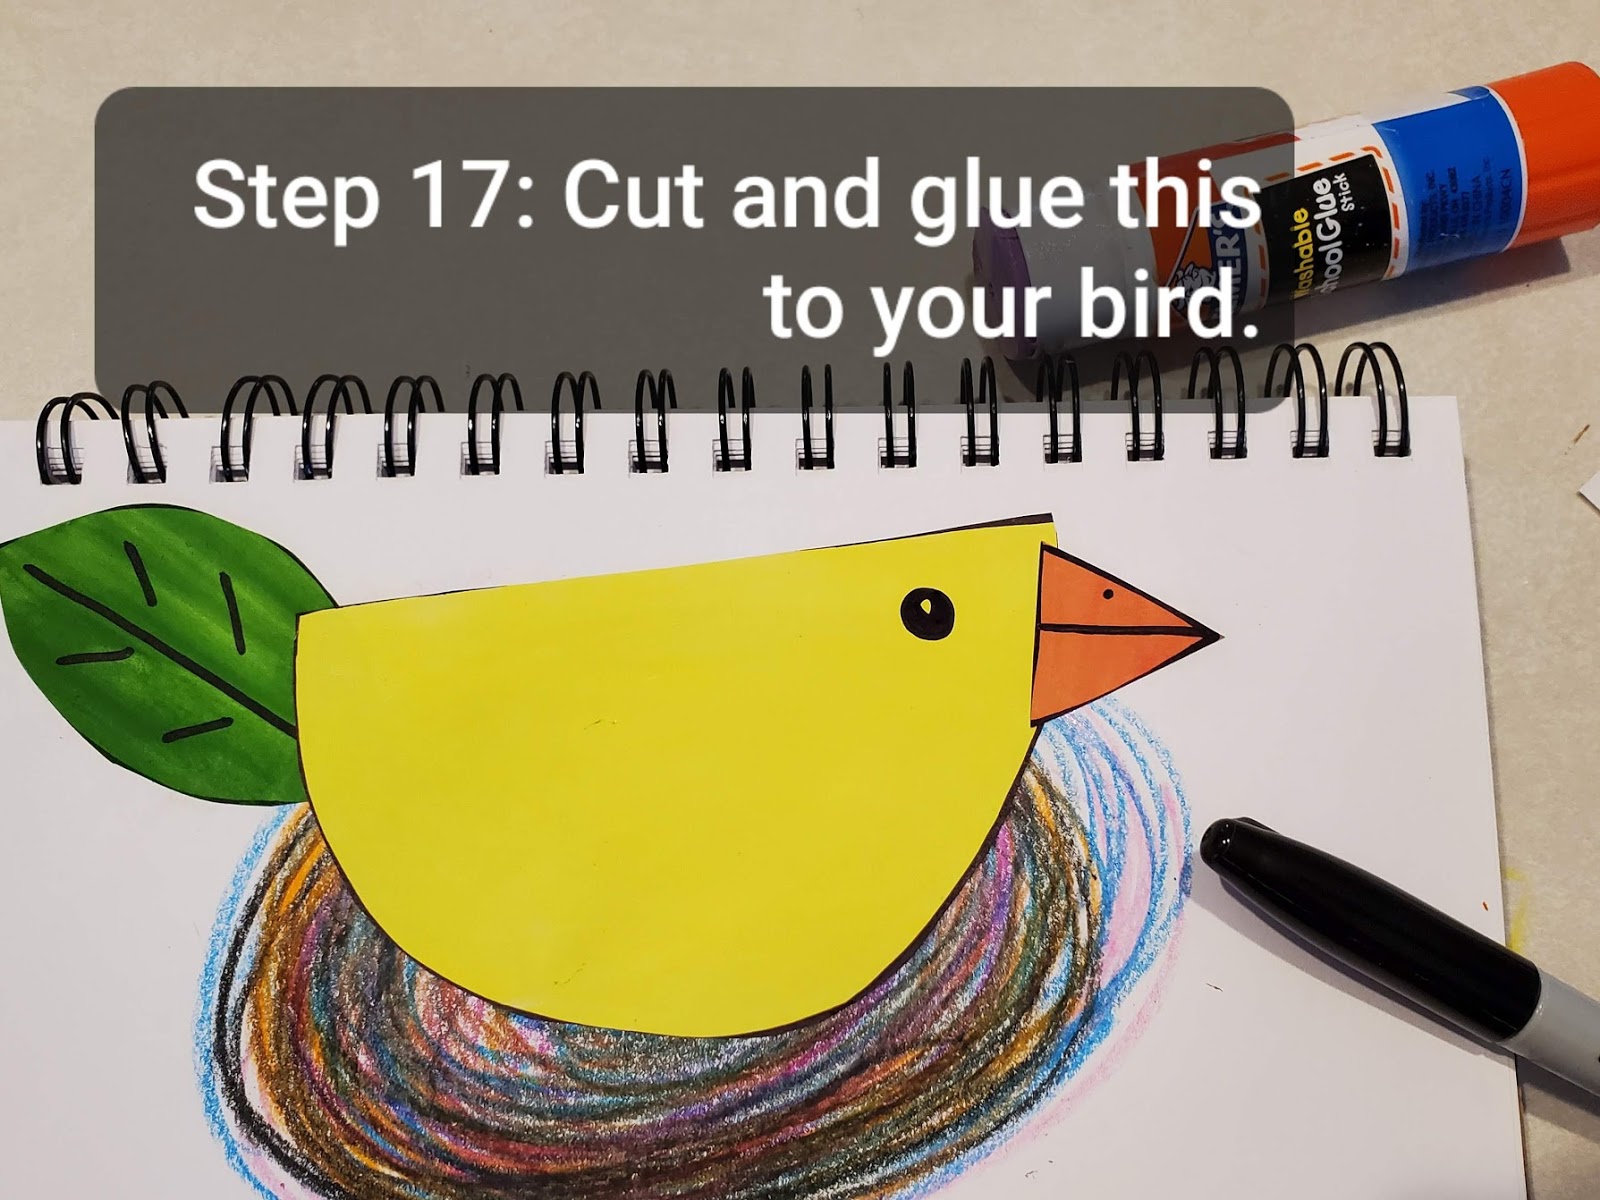
Step 16: Draw a triangle on your orange paper. This will be the bird's beak.

Step 17: Cut out and glue the triangle to the bird's body to form the beak. You can add details inside the beak if you wish. I drew a line to create a top and bottom part to the beak. I also added a dot to give him a nostril to breath.
Step 18: On the piece of paper that you chose for your wing and tail color, draw a half circle and a triangle.

Step 19: Cut out and glue the wing and tail to the body of your bird. If they seem too big, cut them down to make them smaller.

Step 20: On the white paper, draw ovals to make eggs. You decide how many you would like to make.

Step 21: Cut out and glue eggs to the next.

Step 22: This step is optional. If you want to take markers and place designs or patterns in your bird's body feel free to do so. I also added details in the wings and tail of the bird. I had a bit of green left over, so I made some extra leaves to go around my nest. Feel free to put your creative spin on it!

No comments:
Post a Comment