

Supplies Needed: paper, pencil, eraser, black marker, ruler, black crayon and markers.
I have photos posted for all of the steps. I encourage you to read the directions as well for additional instruction or creative choices.
Step 1: Using a ruler, create a large "X" on your paper going from one corner to the other.

Step 2: Put a dot in the center of the "X". This dot is called a vanishing point and will help us with perspective in later steps.

Step 3: Create a square around the dot using your ruler.


Step 4: Outline. DO NOT outline the dot.

Step 5: Line your ruler up on the dot (vanishing point). Draw a line from the bottom of the square to the bottom of your paper. Make sure the ruler stay on the dot as you draw your line.

Repeat from one side the other. Each time you move your ruler over, make sure it stays on the dot (vanishing point). You want an even number of lines. In my example, I drew 4.
Step 6: Rotate your paper. Do the same steps again. Make sure the ruler is line up on the vanishing point. Draw an even number of lines. I did six no this side.

Step 7: Keep rotating your paper and repeating the steps until you have all 4 sides done.

Step 8: Out line the lines. Notice, I made the lines coming from the corners of the box a bit thicker. DO NOT outline the vanishing point.

Step 9: Using your ruler, draw a vertical line form the bold corner line to the other bold corner line.

Step 10: Repeat your paper and repeat the steps. Note that the line should start where the last one left off.

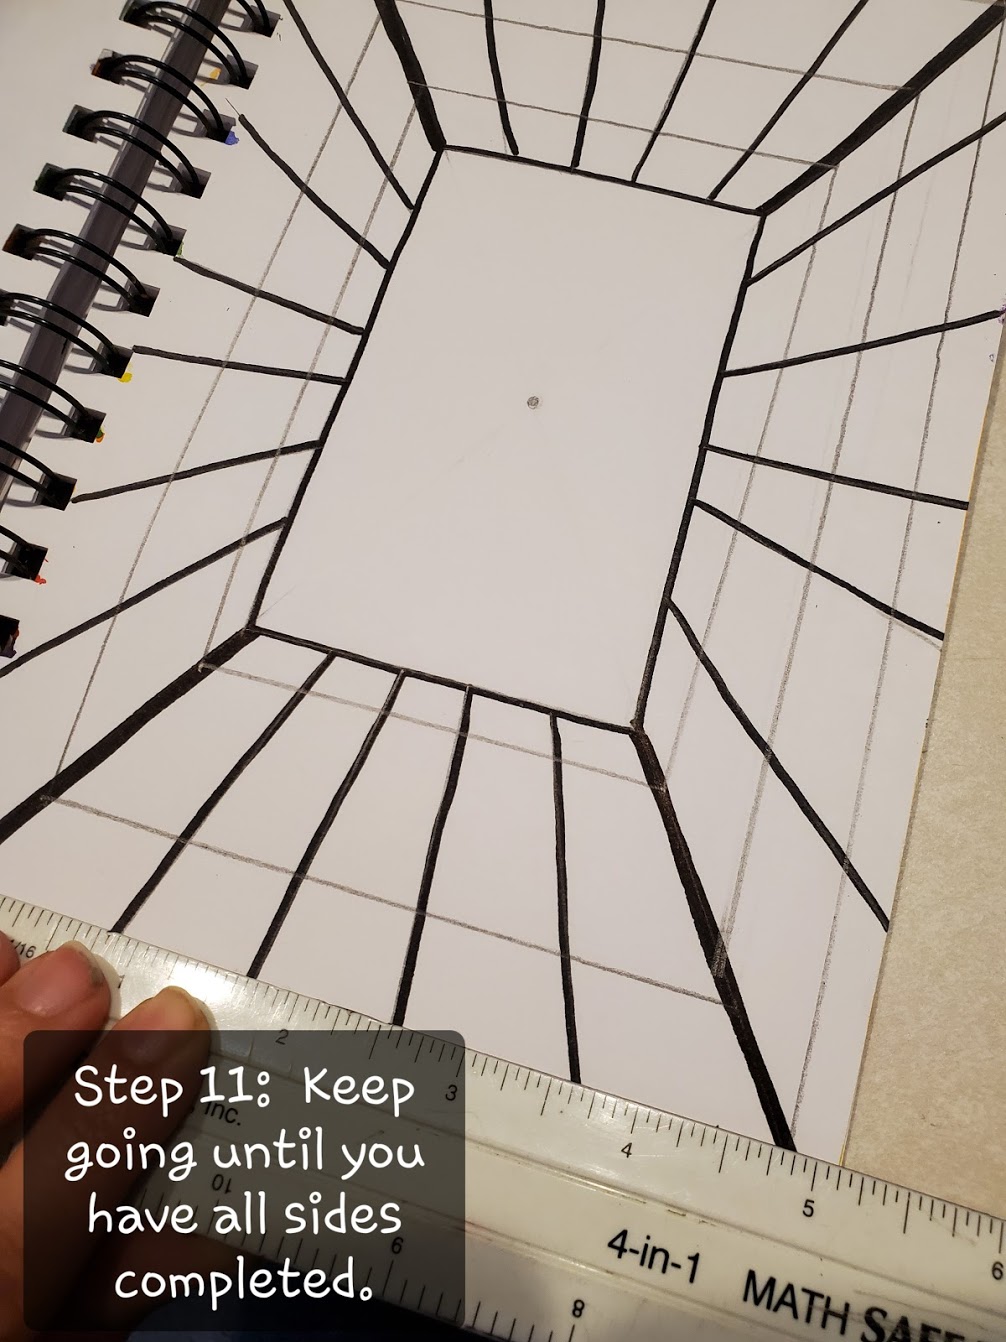
Step 11: Keep going until you have all sides completed. Double check to make sure the lines match up. In the photograph, I marked the areas with a yellow dot, so it is easier for you to understand what I am asking you to double check.

Step 12: Outline the lines. Erase the dot in the center of the square.

Step 13: Now it is time to draw the person in the box. Draw a circle inside the square. This will be the head of your person.

Step 14: Add a rectangle shape for the body.

Step 15: Draw lines to create the arms. Make them almost touch the wall.

Step 16: Add small rectangle shapes to create the hands. If should like your person is pushing up on the wall.

Step 17: Add lines to create the legs.

Step 18: Add rectangles to create the feet. On one of the legs, I drew lines to make it look like my person is bending his knee. Make sure the feet touch the wall. We want it to appear that our person is trying to keep the walls from squishing him.

Step 19: Outline your person.

Step 20: Color the negative space around your person black.

Step 21: Get our your markers. Pick 2 colors. Complementary colors work best to create optical illusions. I suggest using red and green, blue and orange or yellow and violet. Begin by taking one of the colors and coloring every other square in that row.

Step 22: Take the second color and color the empty space between the first squares you colored.

Step 23: Start the next row alternating the colors. It should remind you of a checkered board.

Step 24: Continue this process until all the squares are colored.


Step 25: Using a black crayon, color lightly black on the corner lines. Do both sides of the line. Repeat this on the remaining 3 corners.


No comments:
Post a Comment